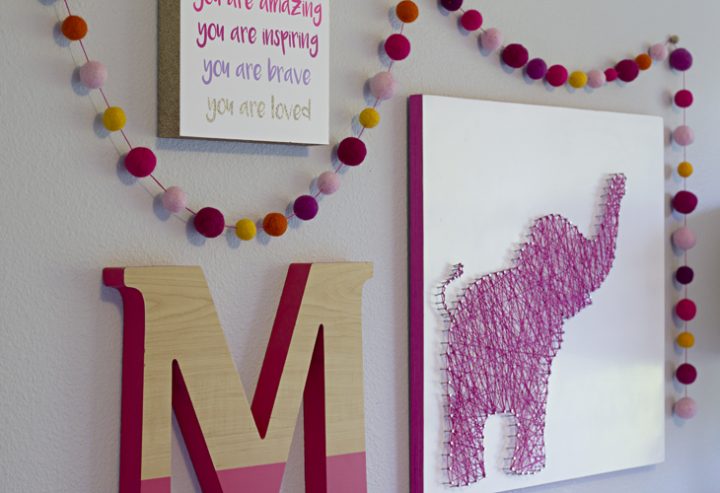
Elegant Elephant String Art
String Art is quite popular today. Firstly, because the result of your work will be beautiful and wonderful. Secondly, the projects are usually cheap, fast and easy. Of course, you can use any shape for string art which you wish, my aim is just to show you how to do it. Let`s get started.
Things you need:
- Board
- Paint
- Tape
- Stencil
- Hammer
- Small nails with a small head to hold the string on
- Embroidery floss
Step 1.
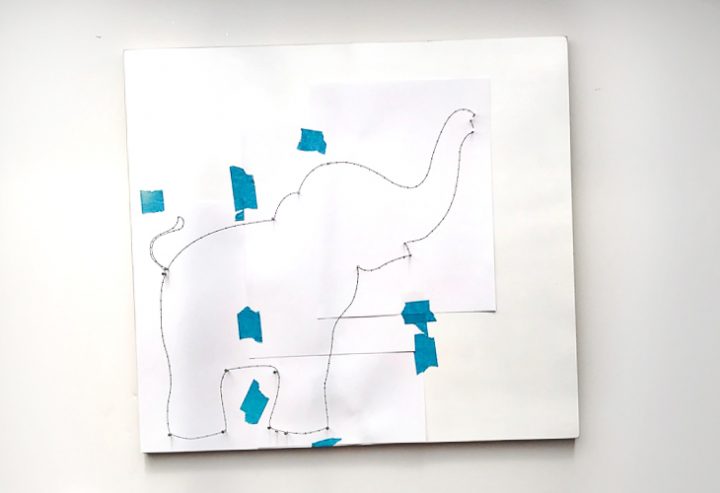
Find a stencil or outline of what you want your design to be. It’s easy to just google “shape” outline and find many different designs.
If you want to do a shape larger than your printer paper, you should be able to change your printer settings to automatically tile the design to print on multiple sheets.
Decide where you want your stencil on your board and tape it to the board. I just cut down some scrap wood I had in my garage and gave it a few coats of pure white gloss spray paint.
Step 2.
Once your stencil is attached, hammer a nail in each corner of your stencil. This makes sure that the important points are in the correct spot so your shape turns out looking like what you want it to.
Then, hammer in small nails every ¼-½ inch along the outline. If your kids are helping, they can hand you nails or if they’re older they could even hammer in the nails.
Step 3.
Start by tying one end of your string around a nail with a double knot. Cut off the tail close to the knot. Now, start wrapping the string around each nail head going around the whole outline.
Now, start wrapping the string around each nail head going around the whole outline. Once you’ve made it around the outline, start going across diagonally and wrap and loop and cross over and over again. Be sure you don’t cross a space outside the shape.
If you run out of embroidery floss, just tie off one end and start a new one.
