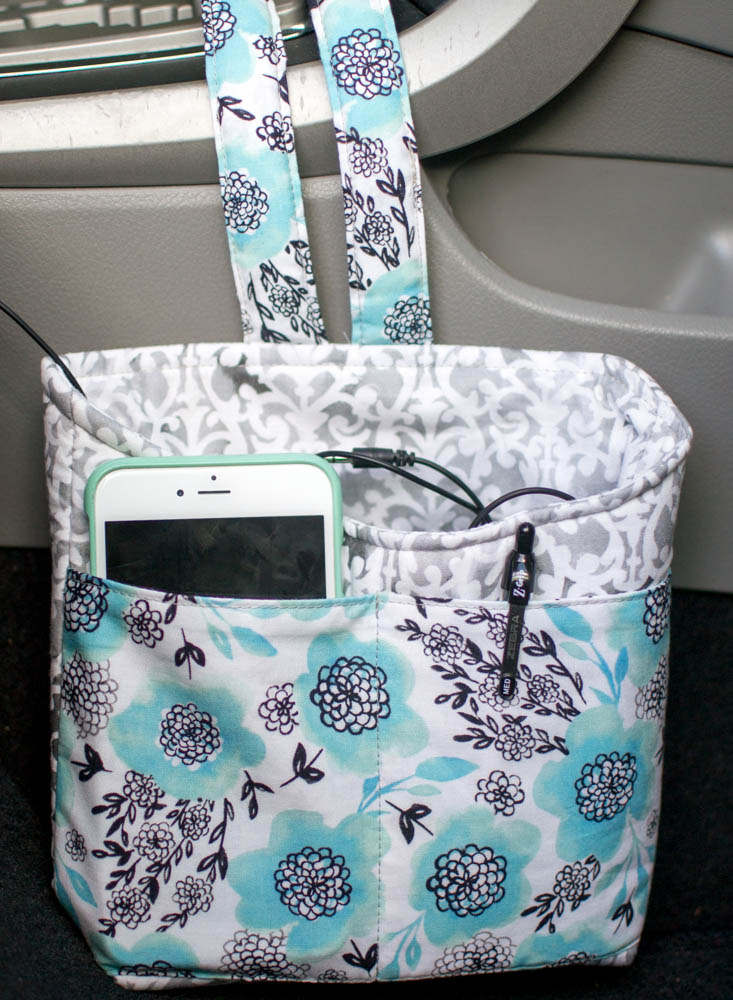
Car Little Bag
I like driving my car and I do it practically every day. But it`s interesting that it`s harder for me to keep everything in order there, as I do it at home. That`s why I decided to make a small car bag to keep everything I need handy. I suppose I can hold there my phone, some pens and anything else that I need while driving a car. Let`s make it together! The finished size of my bag is approximately 8’’ tall, 7 1/2’’ wide, and 2’’ deep.
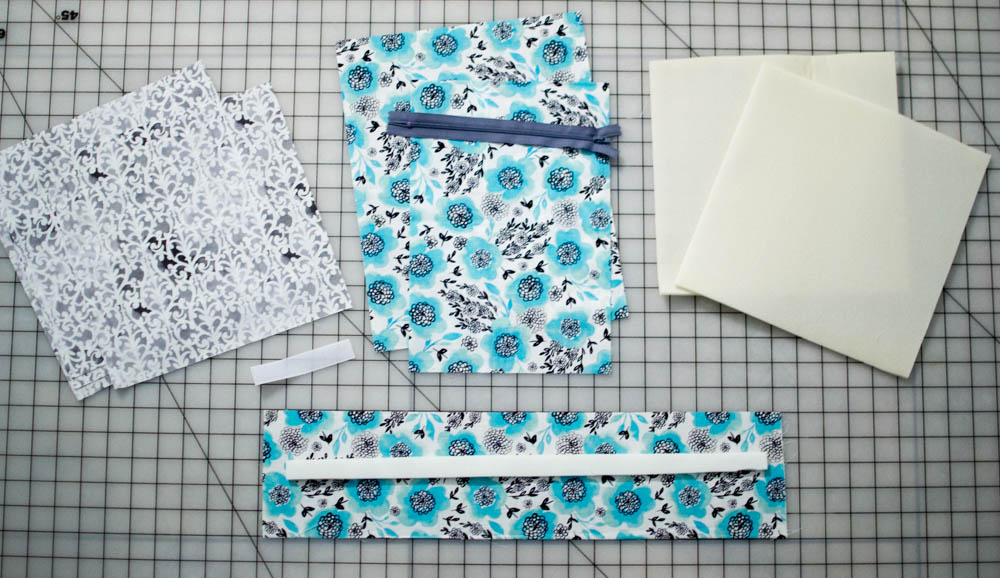
Things you need:
- 1/2 yd fabric for the bag
- 1/2 yd fabric for the pockets & strap
- 1/2 yd By Annie’s flexible foam, fusible fleece, or other stabilizer
- 1 zipper, at least 6'' long (for hidden cash pocket)
- 4’’ strip of hook tape (1/2 of a velcro set)
- scissors
- sewing machine
- needle and threads
Step 1.
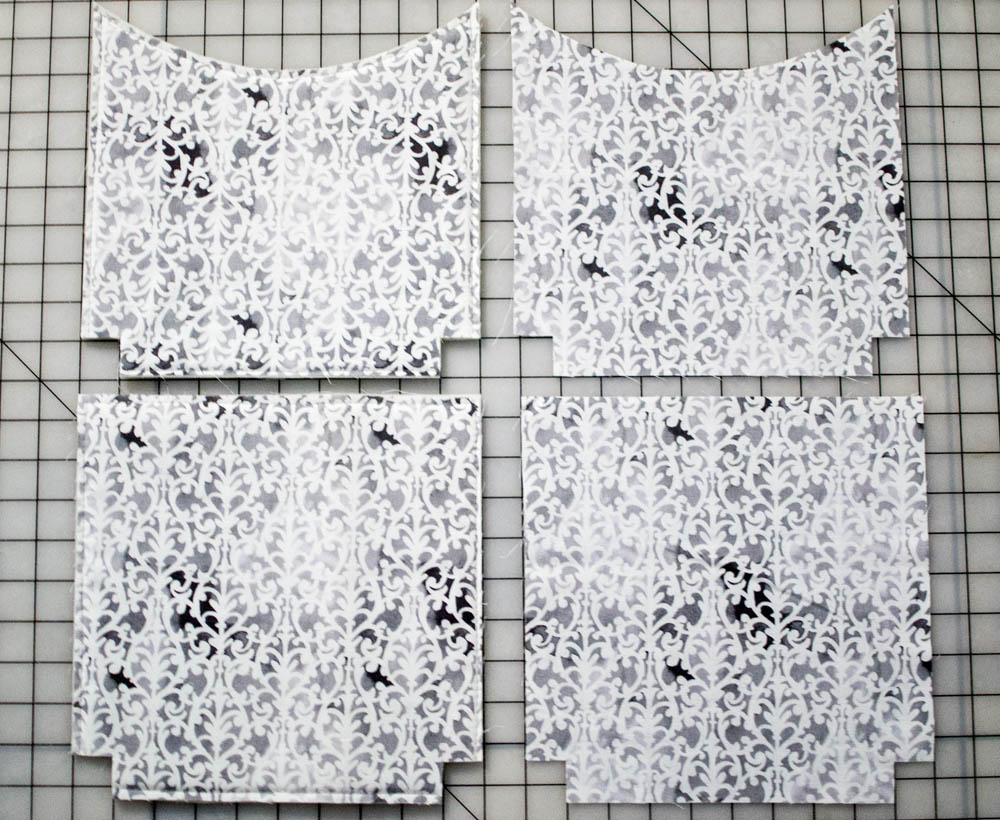
Start with cutting your fabric.
From the fabric for the bag, cut:
4 squares 10’’ x 10’’
From the pocket & strap fabric, cut:
1 rectangle 11’’ x 10’’ (exterior pocket)
1 rectangle 12’’ x 8’’ (hidden cash pocket)
1 strip 4’’ x desired length for strap + 1’’
From the interfacing, cut:
2 squares 10’’ x 10’’
1 strip 1’’ x desired length for strap + 1’’
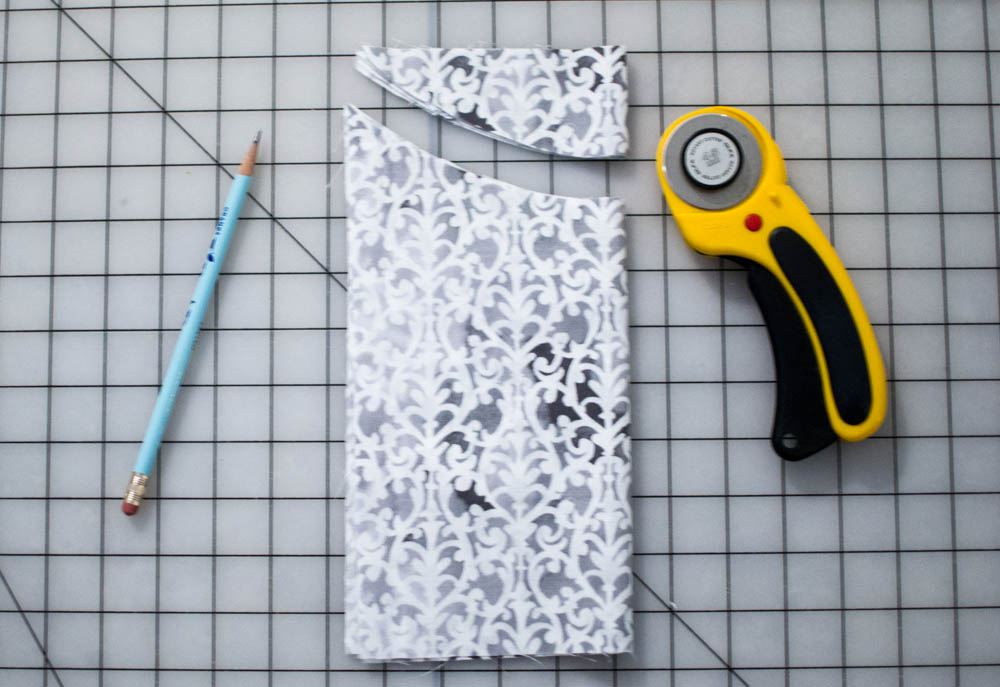
Step 2.
Stack two of your 10’’ squares together and fold in half. Make a mark 2’’ down from the top along the fold.
Using your rotary cutter or scissors, start at the mark on the fold and cut into the square for about 1’’ and then curve upward to the corner.
Step 3.
Open one of the curved pieces, lay it on a square of interfacing, and trim the interfacing to match. Fuse the interfacing to the wrong side of the fabric piece or baste around all of the edges, 1/4’’ from the edge.
Next apply interfacing (fuse or baste around the edges) to one of the square pieces. This is the back exterior.
The two bag exterior pieces (front and back) have interfacing. The bag lining pieces are not interfaced. Cut 1’’ squares out of all of the bottom corners of the front and back pieces.
Step 4.
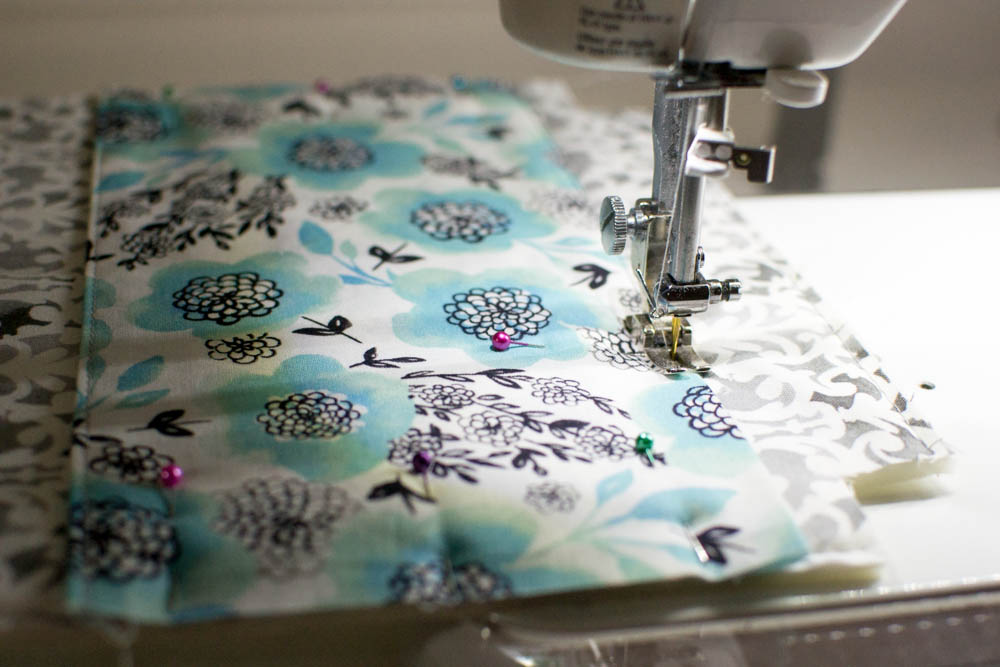
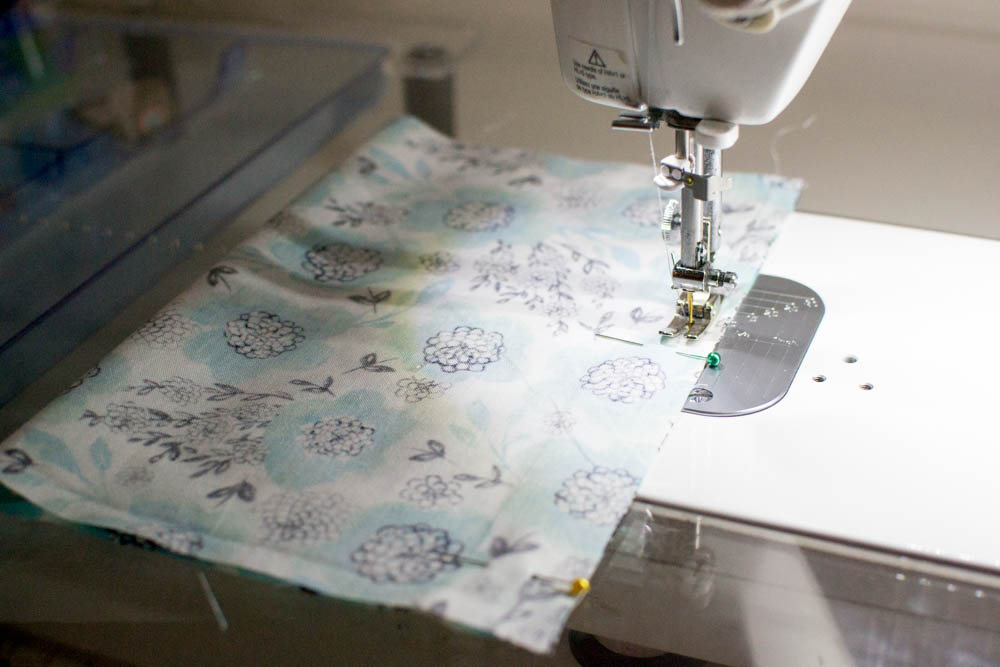
Make the front pocket (3/8’’ seam allowance).
Fold the 11’’ x 10’’ pocket rectangle in half with the 10’’ edges touching, right sides together. Pin and stitch along the long edge.
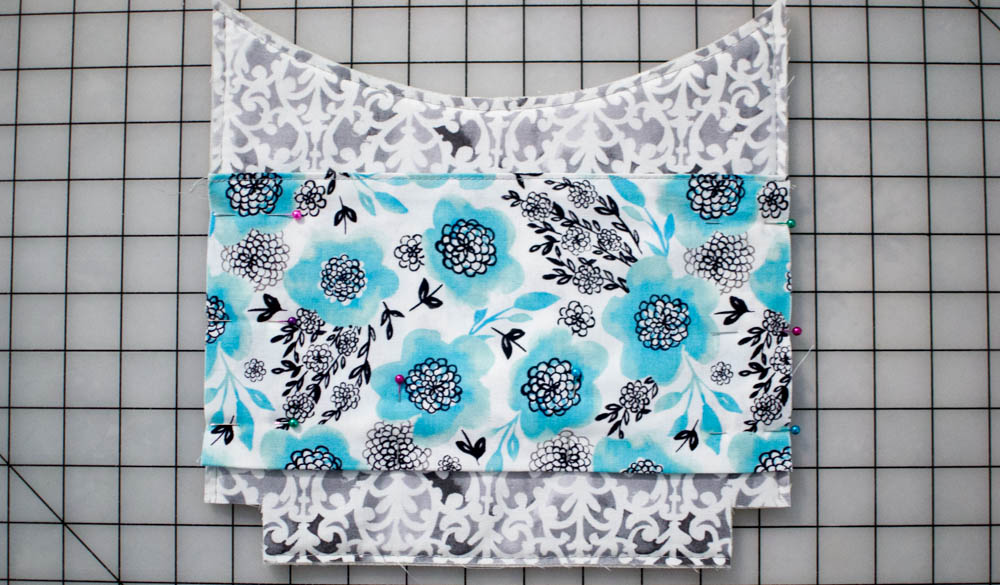
Step 5.
Turn the pocket tube right side out, and press. Topstitch along the long edge that you’d like to be the top of the pocket. Lay the pocket over the curved front piece that has interfacing. Pin it in place 1/2’’ above the cut-out corners.