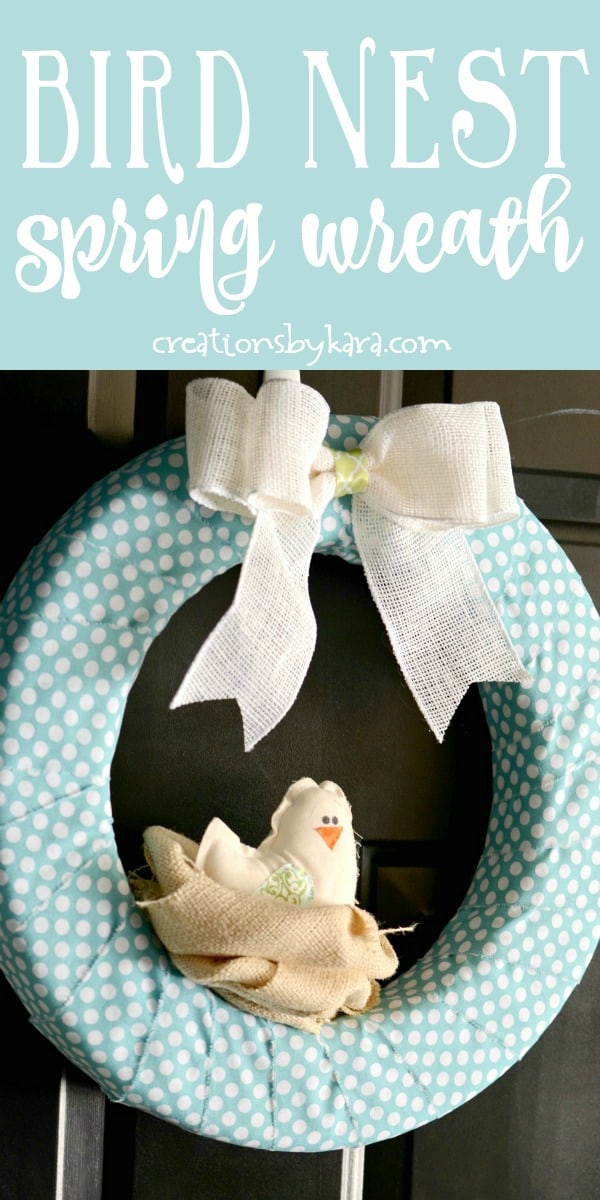
Cute Bird Nest Wreath
You know I have already published one of the tutorials about spring wreath, but today we will have another one because it`s super cute and nice. The singing of birds makes me happy: it means that the spring is coming and a lot od sunny days will be soon. So now all my visitors firstly meet with my pretty little bird on her nest and they like it so much. Let`s make it together!
Things you need:
- 1 Foam wreath (Mine was 16″)
- 1/3 yard fabric, ripped or cut into 3″ strips
- Fabric Scissors
- Pins
- Scrap of burlap
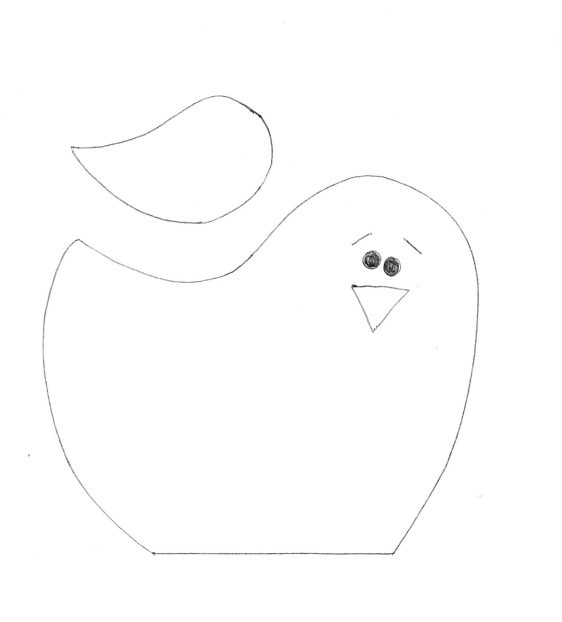
- Free Bird Pattern
- 2 7″ squares of fabric for bird body
- Fabric scraps for wing and beak
- Fiberfill
- Permanent Marker
- Needle and thread
- Hot glue and glue sticks
- 1-2 yards of ribbon for bow
- Small scrap of ribbon for wreath hanger
Step 1.
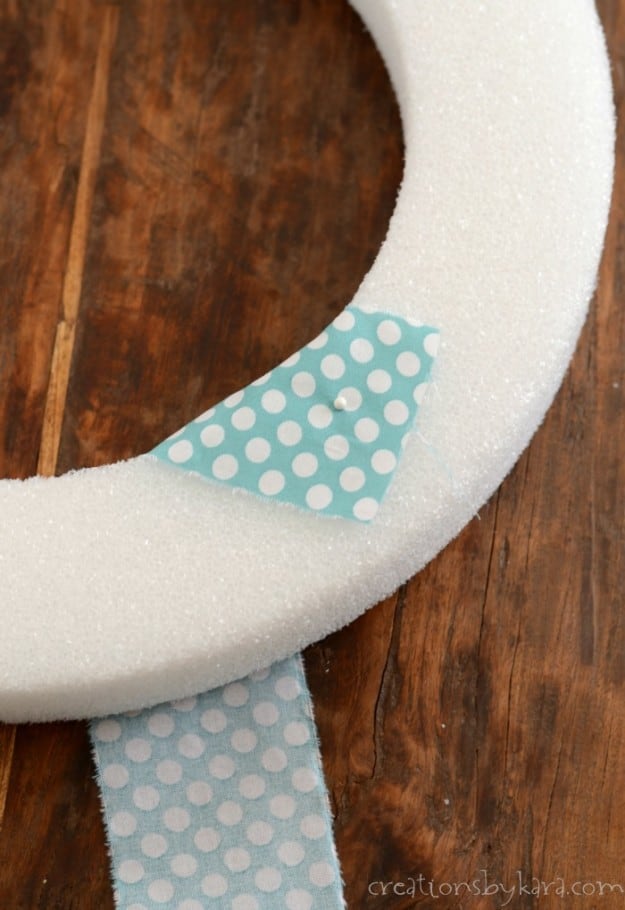
First up you need to wrap your wreath form with fabric. Take one of your strips, and attach it to the back of the wreath with a straight pin.
Step 2.
Keep wrapping the fabric around, and when you get to the end of a strip, just add another piece on top, and pin them both down together. Keep going till your whole wreath form is covered. I like to attach the end of the last fabric strip with two pins.

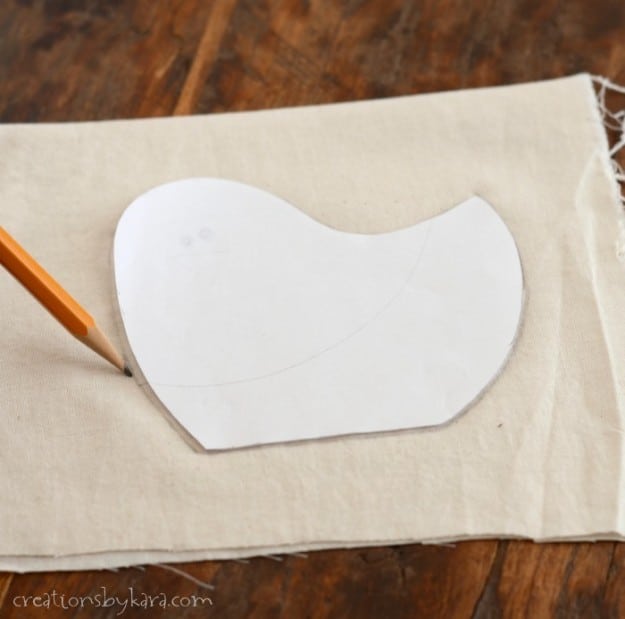
Step 3.
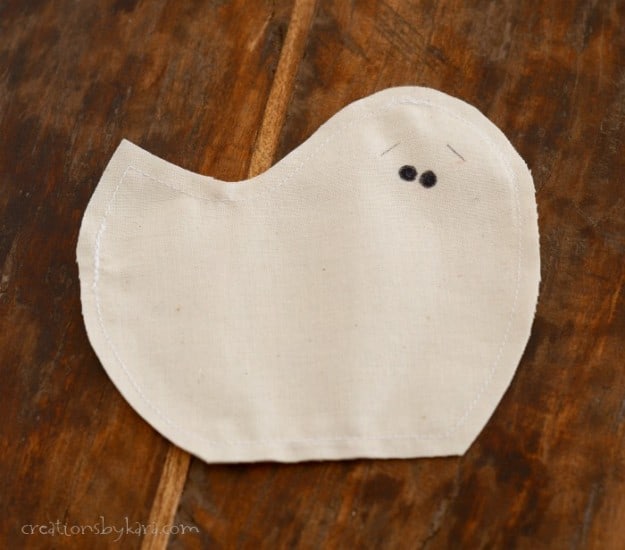
Now it’s time to make the cute little bird. Place your two squares of fabric on a table right sides out. Cut out the bird pattern and place it face down on the back side of your fabric. Trace around the edge of the bird pattern with a pencil.
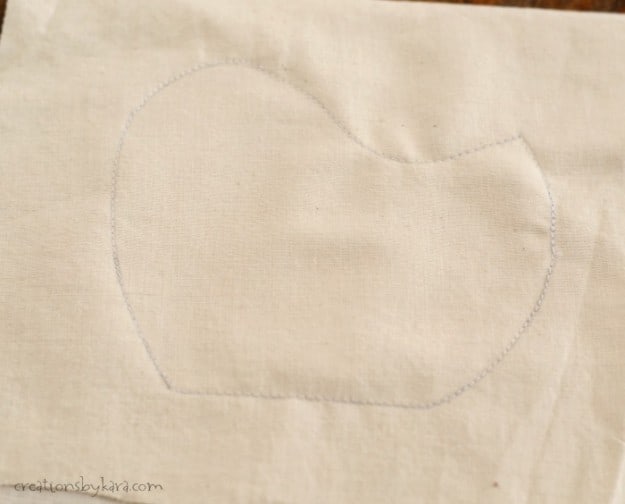
Step 4.
Sew the two pieces of fabric together by stitching directly on the line you traced.
Step 5.
Cut out the bird, keeping your scissors about 1/4″ from your stitching line. Draw or sew on eyes and eyebrows with a sharpie marker or fabric marker.