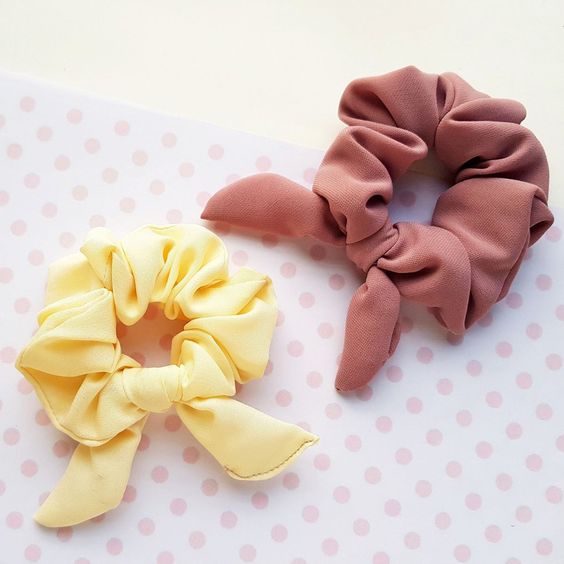
DIY Bow Scrunchie
Looking to add a touch of style to your hair accessories collection? Why not try making your very own bow scrunchie? This fun and easy DIY project will not only allow you to customize your scrunchie to match your personal style, but it will also give you a sense of accomplishment when you see the finished product. Whether you choose to wear it as a cute hair accessory or gift it to a friend, this DIY project is a great way to unleash your creativity and add a personal touch to your style. So go ahead, grab your materials, and get crafting!
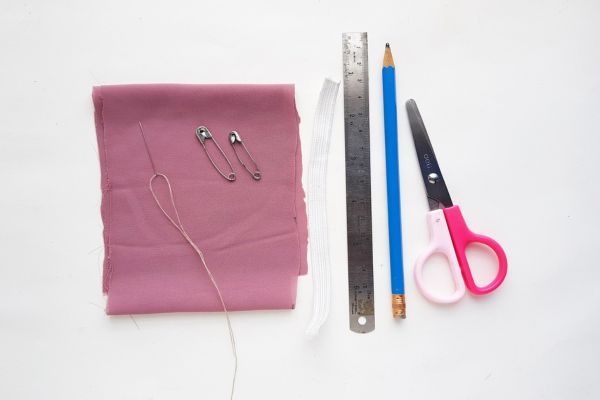
Materials Needed:
- Any Fabric of your choice – Lighter fabrics such as satin and silk are great options but you can use any fabric you like, even cotton or velvet to make a diy scrunchie. You will need about 13-inch x 5 inch fabric pieces for each finished scrunchie.
- Fabric marker – You can use a pencil or a piece of chalk.
- Ruler
- Scissors
- Needle or a sewing machine – I recommend a sewing machine if you’re making these in bulk to save time.
- Matching Thread
- Elastic ribbon – 1/4 inch elastic is a good choice.
How to Make a Scrunchie With a Bow
Here’s how to make bow scrunchies & how to make DIY scrunchies (steps 1-7 only for a basic scrunchie.)
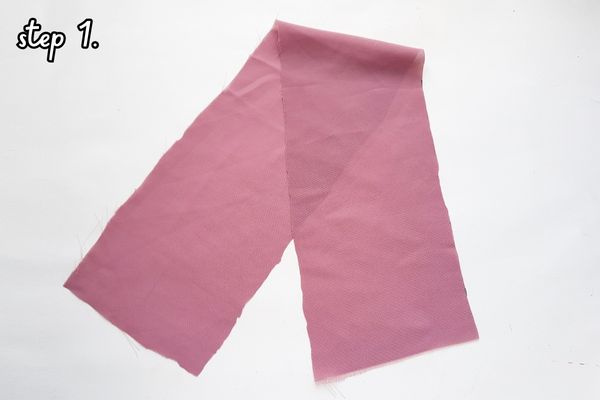
Step 1: Measure and mark the fabric for the scrunchie base. The longer the fabric, the more ruffles. We prepared a 13-inch X 3-inch piece of fabric for the scrunchie.
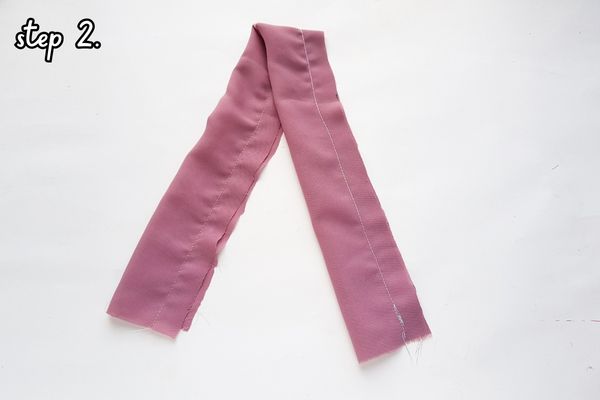
Step 2:Fold the 3-inch side in half and sew along the open sides.
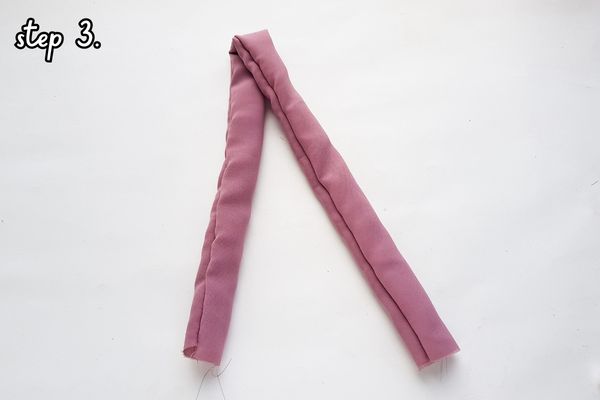
Step 3: Carefully turn out the right side of the sewed fabric.
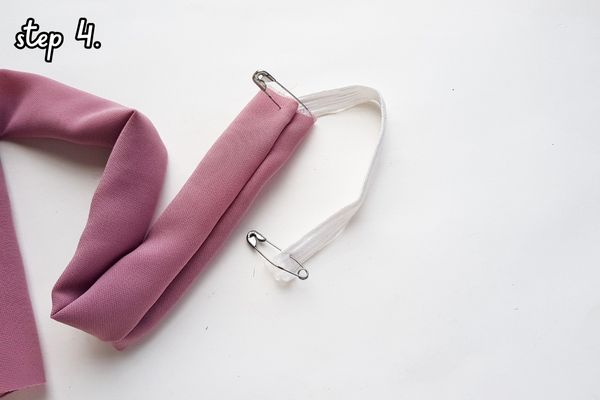
Step 4: Measure and cut out an elastic band (1/3 of the fabric’s length). Use a safety pin to attach the elastic ribbon with the scrunchie base on any one open side and attach another safety pin on the other end of the elastic.
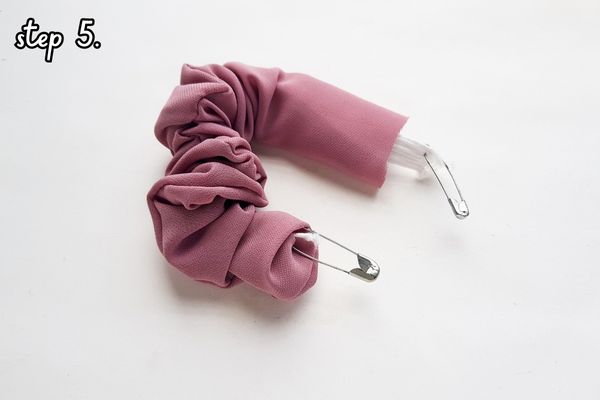
Step 5: Insert the open end of the safety pin-attached side of the elastic ribbon through the small opening in the scrunchie base. Draw the elastic all the way through the other side and pull out the elastic.
Step 6: Take off both safety pins without letting the elastic go. Hold both ends of the elastic tightly and sew them together to secure/close the open ends.
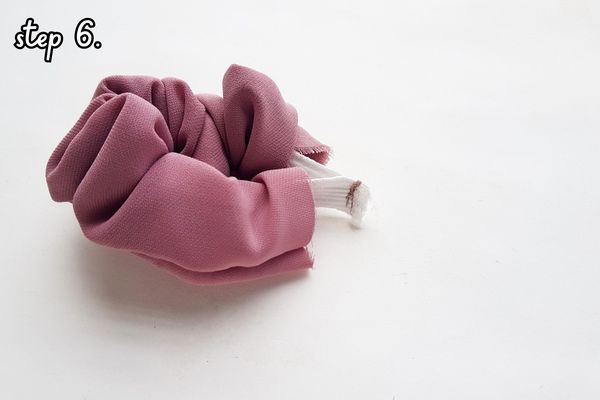
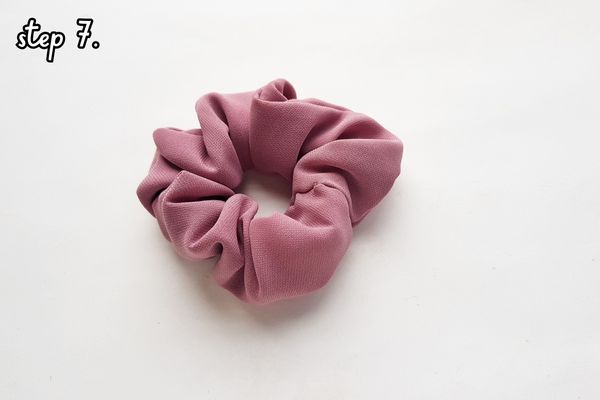
Step 7: Now, sew the open sides of the scrunchie base using a sewing machine or by using needle and thread; whichever you find easier.
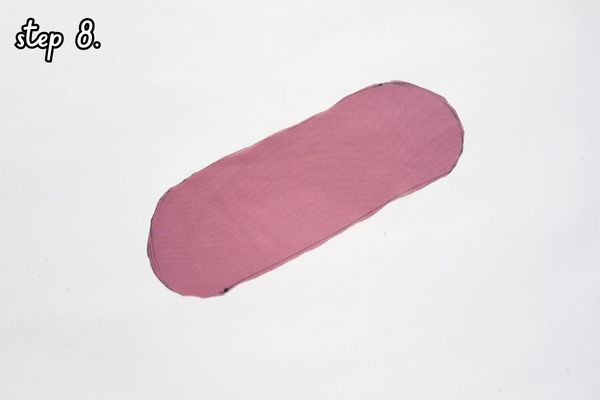
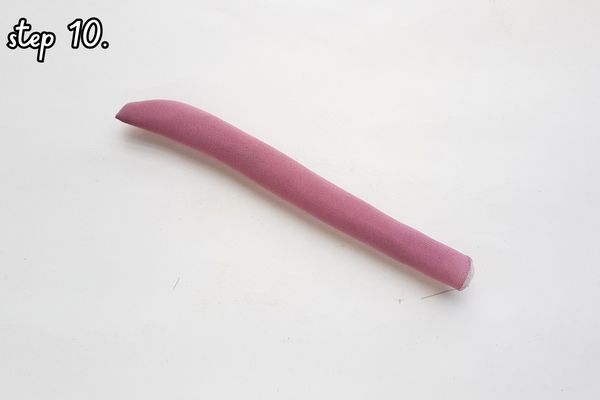
Step 8: Prepare a piece of fabric for the bow part. You can measure and cut out a rectangular fabric with round corners. We prepared a 2.5-inch X 6-inch piece of fabric with round corners.
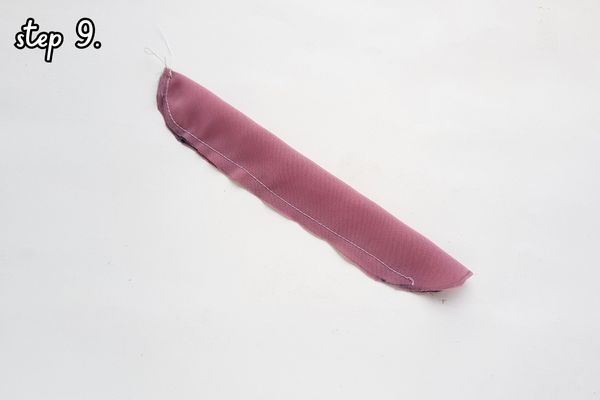
Step 9: Fold the fabric in half, lengthwise and sew along the open side but remember to keep a small open end.
Step 10: Turn the right side of the bow fabric out through the small open end.
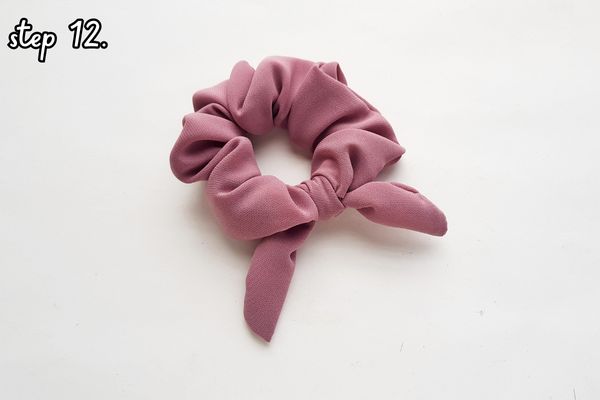
Step 11: Stitch and close the small open end of the bow base. Draw the bow base through the center of the scrunchie and keep even length on both sides.
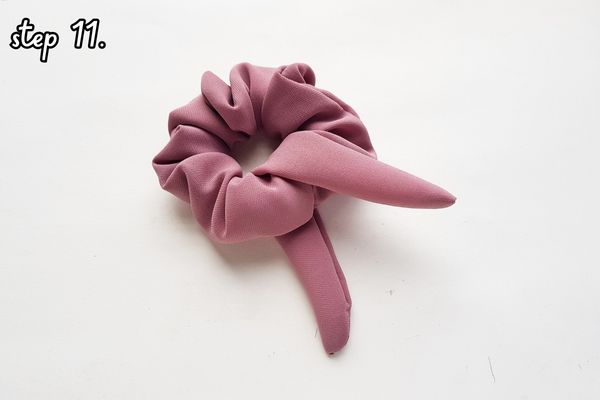
Step 12: Tie a tight knot around the scrunchie band by using both ends of the bow base; and done!